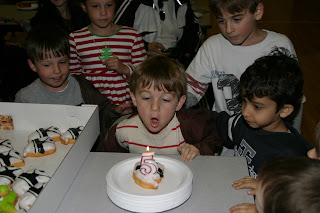
Party Day!
Well, we had one happy Jedi birthday boy today =) Everyone had a blast, and I’m excited to share the details!
Upon arrival every Jedi received his robe and lightsaber and prepared to enter the Jedi Academy! (The lightsabers here were great fun, but order extra because a lot of them didn't light completely.)
There were four tasks to hone their Jedi skills. First: Lightsaber Technique. Keep a balloon up in the air as long as possible using a lightsaber. The kids went absolutely nuts for this game, played it on and off for the entire party. And, as an added bonus, it kept them from hitting each other with their lightsabers too often. =)
Second Task: Jedi Agility. I used a red plastic tablecloth to represent the lava planet, and they had to cross it safely by touching only the black rocks. Eric added an extra dimension of trying to cross it quickly enough to stop a balloon he threw in the air from hitting the ground.
Third Task: Jedi Speed. I set up a simple obstacle course of cones that the kids had to run and jump through, and then they ended by defeating a stormtrooper with their lightsabers. (Found idea here)
Fourth Task: Aim and Accuracy. I had been wanting to build a cornhole board game since we played it at Eric’s Aunt’s house this summer, and this was the perfect opportunity! My dad and I built it generally using the instructions from here. It was very sturdy, which is good as my two year old likes to use it as a slide. I sewed the corn bags and the Jedis practiced their throwing skills. Using the Force, of course.
After some crazy playtime, we took a brief break for pizza. After pizza, we took each of the kids pictures with this X-Wing that we built from cardboard. I even made an instrument panel for the cockpit and R2D2, although tragically R2D2 fell out of the car and didn’t make it to the party. (I did get some setup pictures with R2D2 though =) We’ll play with him later.)
Then, we had a surprise attack from Darth Vader! Vader reveled in the opportunity to attack the Jedi Academy, although he was soundly defeated by the Jedis.
Finally, we had a Death Star Pinata. (You can see it in the background of the picture above, along with my daughter trying desperately to reach it because she is aware that there is candy inside) This was a lot of fun, although it was my first piñata and my first paper mache in a long time and I made several mistakes. First of all, two days before is not soon enough to start. Second, let the first layer dry completely before adding more. The inside was still soggy 36 hours later. So what I ended up with was a very sturdy outside, but a flexible structure, so all the kids got to beat on it but it just got flatter and flatter instead of breaking! So moral of the story, piñatas need to be started first on the project list, and dry between layers even if you manage to find one single website that says you don’t have to =)
I filled the piñata with candy and little Star Wars figurines, (I think the kids wanted the little guys even more than the candy, they left some candy behind!)
I filled the piñata with candy and little Star Wars figurines, (I think the kids wanted the little guys even more than the candy, they left some candy behind!)
Barrett doesn’t like cake or ice cream, so he requested Star Wars donuts! Aren’t they cute?
Every Jedi received a training certificate that I found through Tip Junkie's site.
Oh, and Serenity actually wore her Yoda Hat! Here's the instructions on how to make your own.
Follow the links to find out where I found tutorials or purchased my supplies! =)


