Showing posts with label birthday party:superwhy. Show all posts

Sunday, June 5, 2011

SuperWhy Book Club Card Table Tent: Roof!


Card Table Top:
The book club roof looks like an actual book, so I had to make a big book for Serenity’s card table tent as well!  What I ended up doing was just using felt to cover a big piece of cardboard that I bent in the middle several times to make it look like a book binding.  Then I took two big pieces of felt and glued them down the center so that the book has pages!  I think at some point we’ll use our felt board pieces to make our own stories in it!  Should be a blast!  And for now it’s a cute roof. =)   

If you want to see more, here are Sides One, Two, and Three!


To see the rest of the birthday extravaganza, go here!

Saturday, June 4, 2011

SuperWhy Book Club Card Table Tent: Side Four

If you want to see more, here are Sides One, Two, and Three!
Card Table Tent Side Four:
On this side I made a big book for her to “jump into!”  (they always do that on Super Why)  I ordered a ton of felt letters off of etsy, basically a set of scrabble tiles to figure out how many vowels I needed with some extra of certain letters to spell common words, like extra Ys and Zs. (Gotta be able to spell her whole name, and pizza!)  She loves writing words with the letters! And they are great for spelling games and rhyming games!  The book itself just has strips of the poky side of the Velcro, which the letters stick to very well.  (Which is good, because no way do I have the patience required to sew Velcro on each letter!!!)  


To see the rest of the birthday extravaganza, go here!


Friday, June 3, 2011

SuperWhy Book Club Card Table Tent: Side Three

http://cleverfaeries.blogspot.com/2011/06/superwhy-book-club-card-table-tent-side.htmlIf you want to see more, here's Side One and Side Two.

Card Table Tent Side Three:
This side was a LOT of fun!  I made a little doll out of felt and ironed it onto the side, and added Velcro so we could play dress up!  I just cut basic shapes out of felt for shoes, boots, and dresses, although I did fancy one of the dresses up to look like Belle’s ball gown, as Serenity was in a Beauty and the Beast phase for a while.  I added some strips of Velcro as a little closet to store the extra pieces.  She has bows in her yellow hair, and blue eyes, which my daughter likes to say, “her eyes are blue just like mine!”  The best part of these dresses is that I got to use this stiff iron-on stuff called fast2fuse that my Mom got, so they are very sturdy.  I like that stuff, although it seemed to take a long time to iron on securely.  Probably I was being too cautious as I have melted felt with my iron trying to iron it on something… more than once and to the detriment of my iron, that can’t be used without a press cloth right now!


To see the rest of the birthday extravaganza, go here!

Thursday, June 2, 2011

SuperWhy Book Club Card Table Tent: Side Two!

Here's the link to side one!
Card Table Tent Side Two:
The second side I wanted to have a window and some pockets to hold books like they have at the book club.  The window was easy enough, I just cut the hole the size I wanted, top stitched the lavender fabric in place, and then ironed on the yellow felt rectangles to the inside and outside.  The hardest part was that I wanted the felt to cover the raw edges of the lavender suede.  So ironing on the first side of the border, I had a little piece that I had to be careful not to iron until the top piece of felt was in place.    

Then as far as the pockets are concerned… mine is a cautionary tale.  I made them much too shallow( I wanted them to look like shelves), so they tend to dump out any full sized books.  They mostly just hold her stuffed Super readers, unless I put something stiff behind them.  So, make your pockets deeper, and the higher up one tends to hold stuff better than the one at the very bottom, unless you stiffen that side somehow.  I might go back and add sew a piece of cardboard into a casing to fix this problem… or not, as I seem to have moved on to other projects. 

I also added a little envelope pocket that we use to hold the letters for side #4, or I sometimes put her birthday cards in there so she can play mailbox!  She loves that!  

To see the rest of the birthday extravaganza, go here!


Wednesday, June 1, 2011

SuperWhy Book Club Card Table Tent:Base and Side One

Card Table Tent!
These are so popular,  all over the internet, and I couldn’t resist making Serenity one for her second birthday.  Since the theme was a Princess Presto Tea Party, I made it look like the Book Club on Super Why =)  At least Side One, which I’ll describe first. =) 

The base I made out of a queen lavender suede duvet cover that I was done using.  I love that the fabric is so heavy, because this undoubtedly gets some hard use!  And, it worked perfectly to just drape it over the table and pin it like I was making a slipcover, and sewed the sides down. I just used the hems that were already in place!  Super easy, although it did mean that attaching the decorations was a little challenging, with all that fabric to shove around under my machine. Still worth it as hemming is not nearly as much fun as decorating. =) 

The front side has the door, which I made just by doubling a piece of felt, topstitching, and using iron-on steam a seam to add the question mark to the door.  I cut out a rectangle from the lavender duvet, topstitched the raw edges, and made the pink door a little larger than it so it would cover the gap.  I probably should have made it even a little bit larger, maybe two inches wider, as it sometimes has a gap now when someone has been climbing in the windows too much and the table pulls askew =) 

The huge pencils are attached with Velcro, and truth be told they spend a lot more time off the book club than on.  But I love that she enjoys pretending to write with them and all kinds of crazy games. =)  I made these by cutting a pool noodle from the dollar store in half.  Then I sewed rectangles together to make the pencil design, pink for the eraser, gray for the metal part, yellow for the pencil, off white for the sharpened part, and black for the lead.  I sewed down the long side and at the part that was supposed to look like a pencil I angled it to come to a point, and sewed a little up the other side.  There’s probably a better way to sew a cone but this was easy enough. =)  Then I stuffed the point with fiberfill, and then used the pool noodle to fill the rectangle.  I just pulled the pink fabric together at the top and sewed it shut!  Add some Velcro to the side and it was done!!!  

To see the rest of the birthday extravaganza, go here!


Monday, April 4, 2011

More Superhero Photo Backdrops

Photo Board:
The second photo backdrop was a little more complex to make!  My dad and I bought a huge piece of plywood and painted a picture of all the Super Readers in their Why Flyers.  Then my Dad, using his jigsaw, carefully cut out oval shapes for the faces of each Super Reader.  He added hinges so that we could put the faces back.  (that was in case there were pictures with fewer than four children, so there wouldn’t be creepy headless Super Readers.)  The windows turned out to be my daughter’s favorite part, all the little kids preferred the front side of the photo board to the back. =)  Dad built a simple frame out of two by fours on the back to make it more stable, and added feet to make it stand up.  It was a big hit!  And it’s still hanging in my backyard, and she still loves visiting the Super Readers =) 

** Here’s my best tip if you want to have your own photo booth for young kids, set up a mirror so they can see what they look like.  They were much more excited to poke their head through the window when they could actually see themselves as Superheroes!  For more party details, check out the original post for the Super Why Birthday!

Superhero Photo Backdrops


I still have more details to blog about Serenity's Princess Presto Tea Party!  

I made two different kinds of photo backdrops for this party.  I’ll start with the simplest first!  I bought a big dropcloth from the hardware store and painted it to resemble the backdrop that comes on whenever the Super Readers transform into their superhero selves.  I chose Wonder Red’s backdrop and Princess Presto’s backdrop, as they match the party colors best (pink, purple, and red!)  It was pretty easy to paint.  The dropcloth soaks up so much paint it’s a really good idea to prime it with cheap white paint first.  Then I just took regular acrylic paint and painted the swirls and spirals!  For Wonder Red’s little purple spirals, I found it easiest to paint those on a separate piece of cotton duck cloth and then hot glue it to the background.  Much easier than trying to paint around them =)  I like using a roller whenever possible! 

To hang them I just stapled a one by to the top of the back and draped it over a fence so it’d hang to the ground to highlight my little superheroes!  They LOVED posing in the costumes and capes!  To read more about all the supplies I collected check out the original Superhero Tea Party post!


Thursday, January 13, 2011

Superhero Capes!

For Serenity's last birthday, her Princess Presto Tea Party, I made superhero capes for all the kids!  It was a lot easier than I thought it might be, and I wanted to share a few tips and the design I settled on for them. 


 Here are the general dimensions:
The bottom is 21 inches wide (22 cut), with a gentle curve at the bottom because I wanted it to look wavy.
The length from the bottom of the cape to the neckline is 23 inches (24 cut)  At this point, the cape is 12 inches wide.  So it's a triangle with a rounded bottom. 
Then the neck, which I just eyeballed, is about six inches if you measure from the top of the cape where the velcro is to the neckline.

The general shape is the most important, I sized it so that I could get as many capes as possible from my 60 inch wide fabric. 

The capes are reversible, and I used reds, dark purples, medium purples, lavender and hot pink.  I just sewed two pieces together, trimmed the corners and clipped the curves,  turned it right side out, ironed it and ladder stitched them shut.  For my daughter's, which I fancied up a bit, I top stitched it.  This definitely makes a big difference, but I didn't have the time and energy to do it for all 14 that I made for the party!  Then I just sewed velcro, one to the top right neck piece, on to the bottom left. 

The star and letter applique was very simple.  I just printed the biggest star I could make in photoshop, and the letter S in the Dolphin font, which is one of my favorites.  I used iron on steam-a-seam, and top stitched it for security.  **** I did this before I sewed the two pieces of the cape together!  The capes also look good with big circles or Superman shaped diamonds. 


Part of the party fun was getting to decorate the capes!  I had a ton of sticky-back foam, foam letters, and other stickers for this purpose.  The kids loved them!  And they could add masks, wands and other various accessories to finish their superhero costumes.   I also set up two canvas backdrops with appropriate super hero designs for photos!


Here are some other pages for superhero capes.  I love the applique designs at Puking Pastilles, she even has a SuperWhy design!  And her diagram was helpful for the start of my pattern, although I did a different shape.  I like my pointed corners, I couldn't explain why. =)

And Martha has some more ideas for superhero designs.

Thursday, September 30, 2010

Birthday Parties: A Princess Presto Tea Party! (Super Why)

***I added a tutorial for the book club tent!
*** I added a tutorial for the Super Reader Photo Board!
*** I added a tutorial for the photo backdrops!
*** I added a tutorial for the capes

For Serenity’s second birthday of course the theme had to center around Super Why, her favorite show, favorite books, and favorite toys.  Oh yes, we have the whole SuperWhy lineup, which isn’t actually that many things so I had to make a lot myself.  Which was why it was fun! 


To begin, as they entered the party every kid got to transform into superheroes!  (As they do in every show to solve the problems!)  I had made a bunch of capes in satin and provided lots of sticky foam for the kids to decorate them with!  Then there were the superhero accessories, like glittery wands, crowns, various helmets, and tools.  Everyone loved this part!  Some of the older ones came back to decorate more later. =)  Even Serenity wore her cape and crown for a little while!  I made hers with a little felt appliqué.  I can do a tutorial on that later! 


\

After they transformed into super heroes, the kids came in and found the book club!  In the show, this is where the characters meet to solve problems.  I made this myself from an old duvet cover and a lot of wonder under and felt!  One side has a door with detachable pencils to mimic the look of the book club.  The back has a big book with felt letters that Serenity uses to write words!  One side has a window and some pockets that were supposed to hold books, but they tend to fall out so smaller things work better.  And the last side has a little paper doll princess with accessories that can be switched out!  I’ll do a full tutorial on how I did this if there’s interest =) 


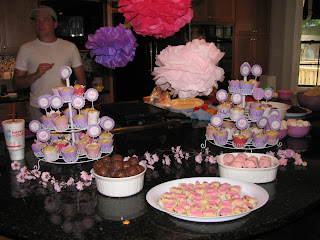
Next up was the tea party aspect of the party.  Serenity loves a good tea party, and one of the Super Readers, Princess Presto, does too!  So we made an elaborate tea party with centerpieces, a fancy feather boa wreath, and a princess chair!  Serenity helped me decorate tea cups.  We also had fancy tea party fare for the food, little sandwiches cut into hearts, sand tarts, and strawberry shortcake. 


The kids favorite activity involved finding Super Letters.  Using my friend Jennie’s cricut (oh how I covet that particular toy!) I cut out red sparkly letters that spelled Happy Birthday, and then made a big board with Velcro so I could hide the letters and assemble the sign as the kids found them.  They LOVED this game!  It was amazing, they were so excited as they found each letter and brought it to me.  After we made the sign they wanted to do it again, so Eric stole letters and kept hiding them throughout the party! 

We also staged some fancy superhero photos with canvas backdrops I painted and a huge photo wall with cutouts.  My dad built it of course, and I painted the mural using his projector.  The older kids loved sticking their faces in so they could be Super Readers in the Why Flyers.  For younger kids, I recommend putting up a big mirror so they can see themselves right away in the photo.  The little ones just wanted to play with the front side of the mural, they didn’t quite get it.  But it was a blast!!!


We also did our traditional fishing, but that deserves another post. 
Whew!  It was an awesome party!  My favorite compliment came from my nephew, Barrett, who said “Aunt Chrissie sure knows how to throw a good Super Why party.”  He also plans to name one of his children after me.  Oh yeah, he’s four by the way.  Love that kid =)