Thursday, October 28, 2010

Ballerina Basket

Ballerina Basket

Serenity decided that she wanted to be a ballet girl for Halloween this year (like Isa in Dora’s Costume Party).  That meant that I didn’t have much to do for her costume as she already has two adorable tutus.  But of course I couldn’t let Halloween go by without a little crafting!  So I made her a Ballerina Halloween Bucket to go with her outfit. 

I started with a 1 dollar purple bucket that I found at Michaels, and a roll of 25 yards of pink tulle.  I chained three rubber bands and hooked them to the handles of the bucket, and then tied the tulle onto it just like you do for an actual tutu. (Stick a loop under the rubber band and pull the two ends through)   I tied the knots pretty tight, I think if you leave them a little bit looser it would take less tulle.  I used every bit of that 25 yards. 


I added in some ribbons and sewed on a few flowers to match the headband I made her.  And there it is!  It was very easy!  I’m not sure that Serenity gets it though, when she saw it she wanted to climb in the bucket so she could wear the tutu…    

This would also make a really cute flower girl basket, although I would start with a container that's not so large(maybe cover it with fabric too so it's dressier), and use elastic that I could actually tack down instead of rubber bands. 

Monday, October 25, 2010

Pumpkin Decorating

Today's activity was making faces for the pumpkins we got at the pumpkin patch last week with Serenity's cousins.  I made a paper with choices of shapes, and Serenity decided what would go on each pumpkin, and after I cut out the sticky foam she put it on all by herself!  She's getting pretty good at placing eyes, nose, and mouth in a reasonable position =)  And we added leaves for hair.  She seems to like the shapes to match, if she uses triangle eyes she wants a triangle nose, if she does circles she wants everything in a circle.  It's cute, she has such an organized soul.  Where on earth did it come from? =) 


The big pumpkin had two sides, it was so much fun once we started we didn't want to stop =) 

Sunday, October 24, 2010

Moses Basket for a Doll =)

Moses Doll Basket Tutorial

Well, last night I got the urge and just couldn’t resist it.  You know the one, when you’ve been thinking about making something and the idea finally clicks!  So at 10pm I started crafting, and this is what I came up with.

I’ve been seeing cute baby doll bassinets everywhere, and when my daughter got the first baby doll she’s shown any interest in, I wanted to make one for her, of course!  But I decided I wanted mine to look woven, more like a Moses basket than a fabric bassinet.  So I decided to make it like a braided rag rug!  I love how it turned out =)  As an added bonus, I had all those yellow fleece scraps in my stash, so I didn’t have to buy anything!!  It took around three hours start to finish. 

First, I cut a bunch of two inch strips from my fleece, about 12 yards.  This was enough to make the base and the sides of the bassinet.  I made about two more yards of two inch wide strips for the cover side. 

Then I sewed the strips together into three long strips.  I sewed at an angle, like you do for binding, so that there wasn’t as much bulk in the braid. 
Sorry for the bad pic, but believe me, there is a wrong way to do this, and I did about all of them.  =)

Then you braid them together.  I tied my strips to Serenity’s Yookidoo (this is a seriously awesome toy btw =)  and started braiding.  I discovered quickly that since I sewed the long strips, it helped if I sort of balled them up to braid.  Otherwise things got seriously tangled.  You could also braid short strips, then attach another strip, then braid, and so on, but I don’t like to go back and forth to the machine that much.  As I was doing it I thought it could be a seriously awesome Rapunzel braid too. =) 

Then I just started making the basket.  The base is exactly like an oval rag rug.  I used yellow Perl cotton to lace it together, which was perfect because it didn’t show.  But really I used it cause that’s what I had.  This project started at 10pm, so I worked with what I had! You lace it just like shoes, through the loops of the braid.  I went under from the back, up through the top.  Check out these diagrams in case that sentence makes no sense.  http://www.craftown.com/instruction/rugs.htm.  My strip started at 10 inches, and then I went around in an oval until it was about 15 inches by 9 or 10 inches. 

Then I started making the sides.  To get them to angle up, I used a ladder stitch to connect the base to the sides.  I’m still going around the oval here, I just switched my stitch. Then when I went around once, I kept going with the normal lacing stitch until it was the height I wanted.  I used about 9 yards of braid, which took the 12 yards of strips to make. 

Then I added the little section over the head.  I added in a new braid strip, weaving in the ends of the knot back into the basket.  Then I went around as far as I thought it should go, and then folded it back on itself to make the little arched top.  Hopefully the picture explains that better =)  Then I attached a little bow to where it connected to the basket, partially because it’s cute and partially to conceal the connection. 

Then I just had to make some handles!  I used one inch strips for these braids, and tacked them on starting right next to where the arch ended.  The handles aren’t quite centered because I figured the weight would be more on the head side. 

So there it is!  A Moses basket for your baby dolls =)  Serenity has been putting Rose to bed all morning.  Thanks for the doll Aunt Jan!!  =)  Let me know if anyone has questions!  I’d love to hear that someone actually used this tutorial =)
Of course, Rose needed covers and a pillow too =) So we used the scarves we dyed =) 

Thursday, October 21, 2010

DIY Felt Pumpkin Game

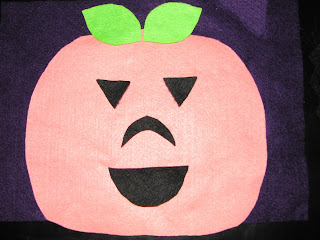
I saw this great pumpkin game at thecraftingchicks and immediately had to see if Serenity would like it.  She loves it!  All it took was a little bit of felt from my stash, cut into a pumpkin shape, and then a variety of shapes for eyes, noses and mouths.  Then I made several samples, took pictures of them, and then gave them to Serenity to see if she could duplicate the pictures.  She says "I will decorate this pumpkin!" And she managed to do every one!  It's a great reinforcement for shapes, and a really fun game.  Here are pictures of the pumpkins I made her, and one of her "decorating" her pumpkins. =)  It was a hit, and took me maybe five minutes to make!  You could do it with construction paper or craft foam if you didn't have the felt on hand. 


Monday, October 18, 2010

Party Design: A Fall Food Table for a Library

My sister hosted a party for some of the teachers at her son's school in the library!  With that for inspiration, we settled on a nice autumn design.  I used books wrapped in brown paper and burgundy ribbon as cake plates to hold her delicious quiche, and an assortment of red serving plates and silk fall leaves for the table.  I love the little pumpkins on candle sticks, and the grapevine wreath was a simple and inexpensive addition.  I got it half off at Hobby Lobby for only 2.50!  I had no idea they were so cheap. 


Sunday, October 17, 2010

DIY Playsilks

Here's an easy way to make great toys for your baby... dyeing playsilks!  I found this tutorial here and it was quick and easy!  I ordered various sizes of scarves from Dharma Trading and used vinegar and kool-aid to dye them.  It takes three or four packages of a color to dye them.  I usually didn't end up with a very solid color, but I like the shaded effect!  


Now for the fun part!  We've used these silks for dancing, as a fancy tablecloth for teatime, as lakes and rivers and other landscape, and for superhero capes!  I've used them as sails for boats, as rainbows, oh they can be anything you or your baby can imagine!  Also great for peekaboo, and just as silky blankets =)  It was definitely worth the time and effort!   I love the open ended playtime and creativity you get from simple things like these. 

Oh, and in case you want to know the colors I used, they were Lemonade, Orange, Blue Raspberry, Cherry, Grape, Pink Lemonade, Lemon-Lime.  I also tried Black Cherry, but the colors aren't as clear and pretty with that one, or with the Grape but I just had to have the purple.  =) 

Thursday, October 14, 2010

Baby Quilt: Simple and Sweet Cherry Blossoms

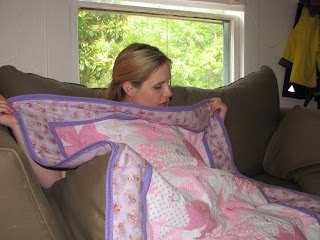
I posted pictures recently of the shower we did for my friend Abbey when she was pregnant with her baby Maggie.  I didn't share yet the quilt that I made for her!  It had to be very sweet and girly, with pinks and purples. Abbey lived in D.C. for quite a while and just loves cherry blossom season.  Abbey's Mom painted a gorgeous cherry blossom tree on the wall of the nursery, and Abbey and I got to paint the blooms.  So I started looking for cherry blossom ideas.  I didn't end up buying a pattern, and instead used a simple free flower block made of squares and half square triangles that kind of interlocks.  I alternated pink and white blooms, and then when I tied the quilt I made little knots in the thread to look like stamen of the flowers.  I didn't get a great picture of the finished project, it was a crazy time, but here's the pattern I drew up in paint and a picture of Abbey opening it so you can see the colors =)  I think each square is about 1.5 inches finished.  I love that fairy fabric, it's got Cicely Mary Barker's Flower Faeries on it! =)

Monday, October 11, 2010

Ode to Shadowboxes

Just a quick post today about one of my favorite projects in my entire house, my little shadowbox.  I  bought it long ago with the intention that I would change it out fairly often.  Well, as often happens, I'd leave something in it for at least six months.  But the latest thing I put in it may just stay in it forever, as it is my very favorite decoration in my house =)  And without further ado...


This little green dress was my favorite of Serenity's clothes her first year.  It was just so sweet on her!  And her tiny shoes are just too cute.  I don't know that I could bear to take it down, having it up on the wall almost makes up for the fact that she outgrew it in the first place =) 

Sunday, October 10, 2010

Kid's Parties Serenity's Barnyard Dance

Serenity’s first birthday was a blast to plan!  I went with a barnyard theme because her favorite book by far was Barnyard Dance by Sandra Boynton.   


Grandpa Bair encouraged me in all my outrageous plans.  I wanted a barn out of cardboard, so he helped me build it.  He added wood trim and made the roof out of planks of cardboard so it looks so real!  It’s amazing!  And I drew a horse for the back wall so there’s an animal inside.  Serenity loves to crawl inside it already to see the horse and play.  There’s also a shelf for her ducky to sit in the hayloft, but she always wants to get her right out =) 
We used white duct tape for the x's and door trim, and a LOT of coats of red paint.

The little wood trim boards added such great detail, it really looked real!  Also, it still folds flat for easy travel/storage.  Yay free cardboard boxes! 

I had planned to draw a few animals on construction paper as decorations… but Dad thought since I was going to do all that work, it should be more permanent.  So he got big pieces of plywood, painted them white, and then drew scenes from Barnyard Dance on them using his projector.  The first time Serenity saw the cow we did, she went nuts!  She kept saying cow… mooo!  cow… mooo!!!!   


Dad and I built a pond too.  Eric’s family always did fishing for prizes at birthday parties, so we wanted Serenity to get to do that too.  Dad had a big blue tarp, and we cut some of the bamboo out of his backyard to look like weeds around the pond.  He even built a little dock for the kids to stand and fish from.  Eric used another piece of bamboo as a pole.  


Other crafty projects I did for the birthday include making a cupcake tower and a Happy Birthday Serenity sign using scrapbooking paper.  
 

7/11
The day of the party everything went really well!  My sister Jennifer cooked all the food, barbecue to match the theme.  I got teased a lot though for the amount of food that I bought… 22 pounds of brisket…10 pounds of pulled pork… sausage… potato salad…baked beans…deviled eggs… cornbread and a ton of fruit.  Plus ice cream and Aqua and Red velvet cake! The cake was not well decorated, but it was saved by the fact that her fisher price animals looked so cute on it, and the red and blue icing photographed really well =)


There were balloons on every table, weighed down with rocks inside little farm animal boxes.  Red tablecloths, her birthday sign, cupcakes with tower, the barn, and lots of animals dancing around everywhere! 

After a bit of playtime, we performed Barnyard Dance for Serenity!  Daddy always dances for her when we read the book, so we planned to do a big dance for the party.  Lots of people joined in and Serenity was thrilled! 

After this, Eric told the adults they could have a wallet sized picture of Serenity, and the kids could collect their buckets and cowboy hats if they hadn’t already.  The hats were a big hit, and so were the bandannas!  Several of the boys asked to have bandannas tied on their heads or necks.  Raegan was very excited to find a pink pig in her bucket.  In addition to the hats, bandannas, and squishy animals they also got stickers, animal crackers, and goldfish.  With the toys from the fishing game it was perfect!  And it was so adorable watching them run around in the little hats. 

Whew, pretty long post!  Thanks for reading, and I hope it gives somebody some good ideas =)